 LNNRW
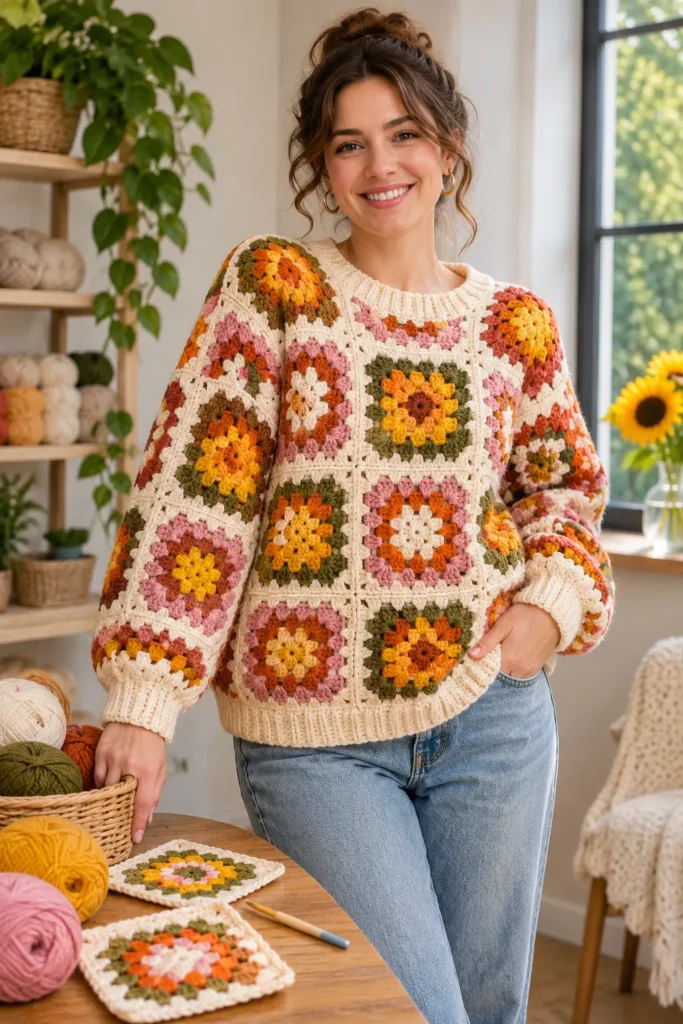
A granny square crochet sweater is one of the most creative ways to turn individual crochet motifs into a beautiful, wearable handmade project.
With its colorful patchwork appearance, cozy texture, and vintage-inspired charm, this sweater style brings personality to everyday outfits.
The best part? If you already know how to make granny squares—or have a collection of finished squares ready to use—you can focus on the exciting process of transforming those small pieces into a complete sweater.
Instead of crocheting a pullover as one continuous piece, this approach involves arranging individual granny squares into garment panels, joining them together, and finishing the neckline, sleeves, cuffs, and hem.
Whether you love bold retro colors, romantic pastels, earthy neutrals, or cheerful sunflower motifs, the same general construction concept can inspire many different sweater designs.
In this guide, we’ll explore how to plan and assemble a granny square crochet pullover sweater, from arranging your motifs to finishing the garment.
You’ll also discover six beautiful color variations to inspire your own handmade sweater.
This is a proposed assembly guide, not a size-graded or physically tested sweater pattern. The layouts and measurements are illustrative and must be adjusted to your actual squares, body measurements, and preferred fit. The AI-generated images are design illustrations rather than verified construction photographs.
What Is a Granny Square Crochet Sweater?
A granny square crochet sweater is a pullover constructed partly or entirely from individual crochet squares.
These motifs can feature traditional geometric patterns, colorful concentric rounds, floral centers, or decorative textures.
The squares are joined to create the sweater’s front, back, and sleeves.
Unlike an open-front cardigan, a pullover sweater has a closed front and is typically worn by pulling it over the head.
Depending on the construction, the neckline may be rounded, square, or shaped with additional crochet sections.
A granny square pullover can be cropped, oversized, fitted, or hip-length.
For this project, we’ll focus on a relaxed, slightly oversized pullover with long sleeves, a comfortable neckline, and decorative crochet edging.
Project Overview
- Project: Granny Square Crochet Pullover Sweater
- Skill level: Intermediate assembly skills
- Style: Relaxed, slightly oversized
- Sleeves: Long sleeves
- Construction: Joined granny square panels
- Neckline: Finished with crochet edging
- Main techniques: Measuring, arranging, joining, seaming, and edging
- Crochet terminology: US terms
- Color variations: Six
- Starting point: Completed granny squares
The exact number of squares will depend on your motif size, garment measurements, and construction plan.
Materials You’ll Need
Before beginning, gather your supplies.
- Finished granny squares in your chosen colors
- Matching yarn for joining
- Crochet hook compatible with your yarn
- Yarn needle
- Stitch markers
- Measuring tape
- Scissors
- Blocking mat and pins, if appropriate
- A well-fitting sweater to use as a sizing reference
- Paper and pencil for sketching your layout
For the most consistent result, use granny squares made with compatible yarn weights and similar stitch tension.
Different yarn weights can cause some motifs to stretch or hang differently from others.
Understanding the Sweater Construction
Before joining any squares, it’s important to understand how the garment will be assembled.
A granny square pullover generally requires four main sections:
- Front body panel
- Back body panel
- Left sleeve
- Right sleeve
These sections must be sized and shaped to fit together.
The shoulders connect the front and back panels.
The sleeves attach around the armholes, and the side and underarm seams complete the garment.
Finally, crochet edging can be added around the neckline, cuffs, and hem.
Choosing your granny square size
Measure one finished and blocked granny square from edge to edge.
For example, suppose each square measures approximately 5 inches (12.7 cm).
A panel that is six squares wide would measure approximately 30 inches before accounting for joining, edging, and fabric behavior.
That may be much wider than the front panel required for a typical sweater.
For this reason, never choose the number of squares based on appearance alone.
Instead, measure a sweater that fits you comfortably and use those measurements to plan the motif arrangement.
Example layout concept
For the AI illustrations in this article, we’ll use a visual concept featuring:
- Front panel: 4 squares wide × 4 squares tall
- Back panel: 4 squares wide × 4 squares tall
- Sleeves: Matching square motifs arranged into sleeve panels
- Relaxed silhouette
- Long sleeves
- Ribbed-style crochet cuffs and hem
This is a visual reference, not a universal pattern. A real pullover may need partial motifs, shaping, additional rows, or a different layout to achieve suitable body width, neckline, shoulder placement, and sleeve fit.
Step-by-Step: How to Assemble a Granny Square Crochet Sweater
Step 1: Choose Your Granny Square Design
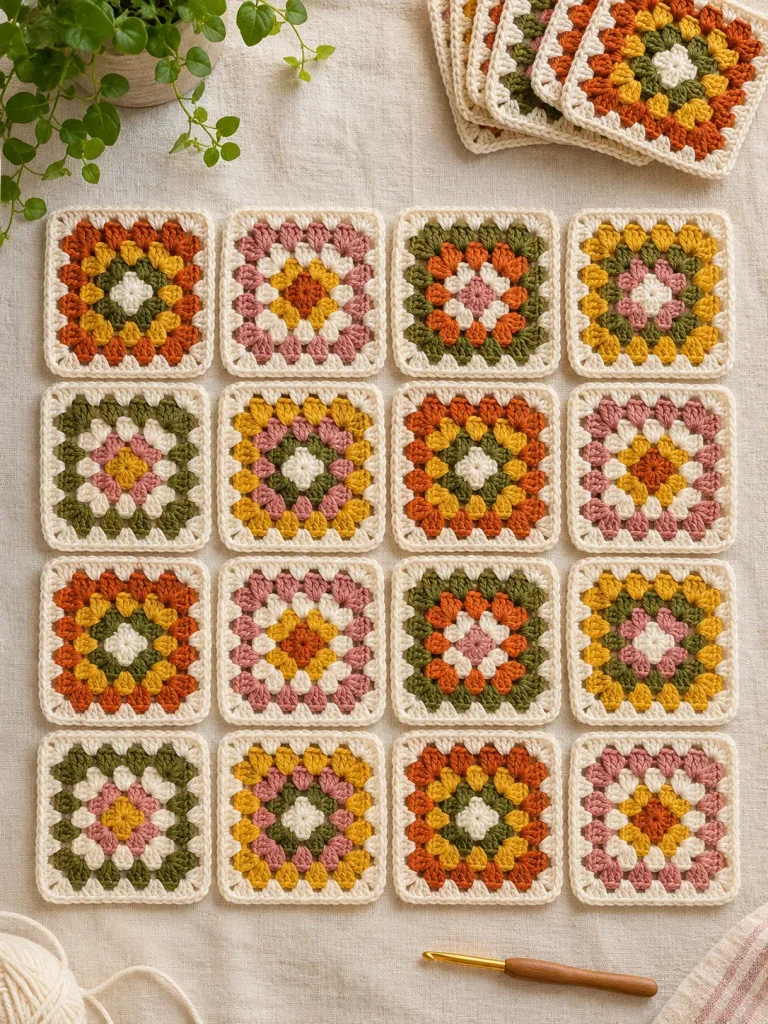
The first step is deciding which type of granny square you want to use.
Traditional granny squares are a classic choice for patchwork sweaters because their geometric structure creates a recognizable vintage-inspired appearance.
Flower granny squares offer a more decorative alternative.
Sunflower, daisy, and raised floral motifs can create beautiful sweater designs, although raised textures may affect how the garment drapes.
For your first sweater assembly project, choose squares that are consistent in size and reasonably flat.
If you’re using squares made at different times, compare their measurements before beginning.
Helpful tips
- Choose one main motif style for a cohesive design.
- Keep the outer borders consistent if using several colors.
- Check that all squares have compatible dimensions.
- Avoid mixing significantly different yarn weights.
- Make sure the squares are flexible enough for a wearable garment.
Step 2: Measure and Plan the Sweater Layout
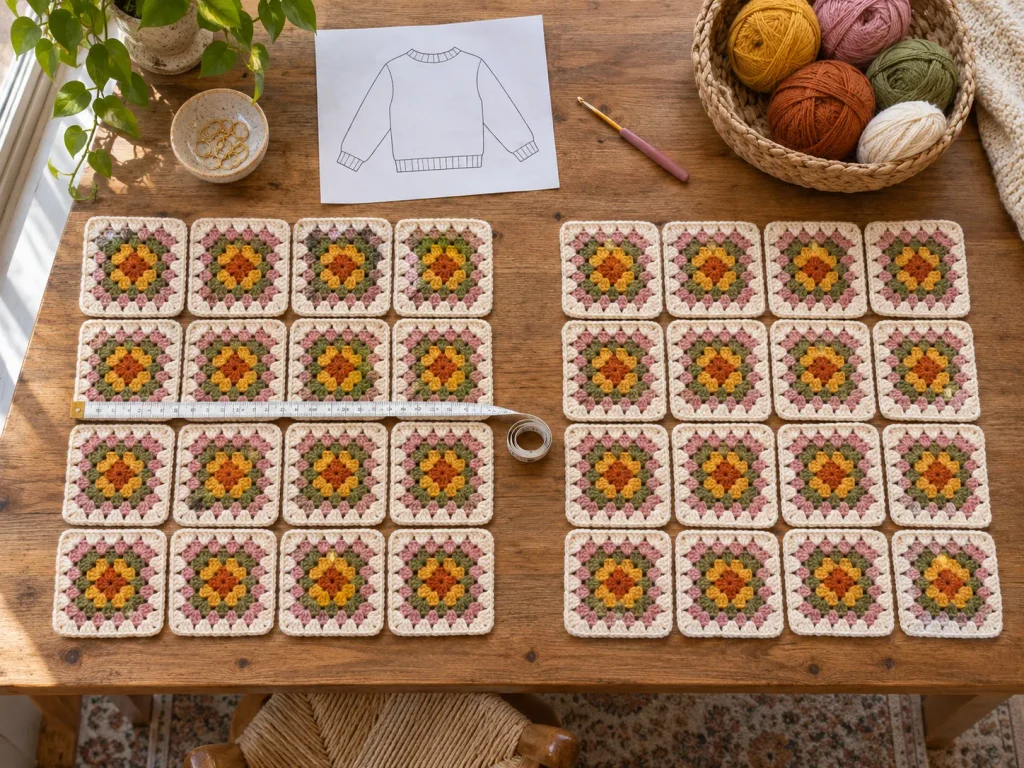
Before joining the squares, determine the measurements of your finished sweater.
Take a sweater you already own that fits comfortably and lay it flat.
Measure the following:
- Chest width from side seam to side seam
- Body length from shoulder to hem
- Shoulder width
- Armhole depth
- Sleeve length
- Sleeve width
- Neck opening width
These measurements will help you determine the size and arrangement of your crochet panels.
Plan the front and back
Arrange enough squares to create the approximate width and length you want.
For a simple visual concept, a four-by-four grid creates a rectangular panel.
However, your actual panel may need a different number of squares.
Remember that the front and back also need a usable neckline and shoulder sections.
Do not assume that two complete rectangles joined across their entire top edges will create a comfortable pullover.
Plan the sleeves
Measure from the shoulder to the desired cuff position.
Decide how wide the sleeves should be near the upper arm and wrist.
A straight rectangular sleeve panel can create a relaxed silhouette, but its width and attachment need to match the armhole.
Helpful tip
Sketch the sweater before assembling it.
Label the front, back, shoulder connections, armholes, and sleeves so you can visualize the construction.
Step 3: Arrange the Granny Squares Into the Front Panel
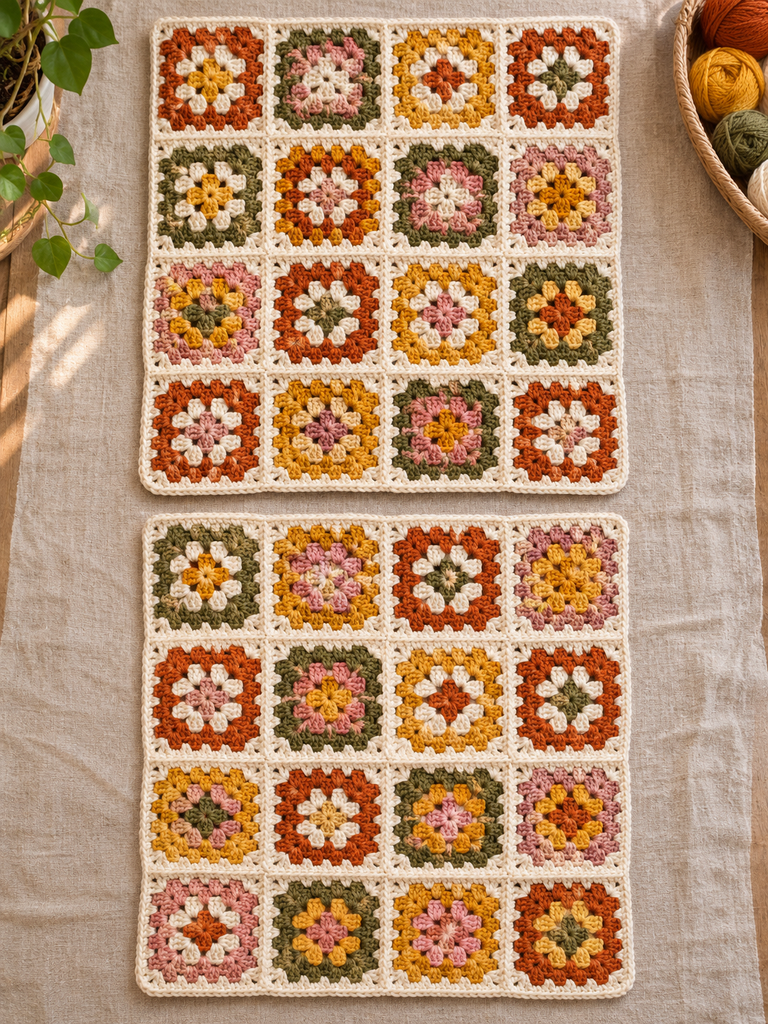
Lay out the granny squares for the front of your sweater.
Arrange the colors until you’re happy with the overall appearance.
If you’re using several colors, try distributing the brightest shades throughout the panel.
Avoid placing all the darkest or lightest squares in one area unless you’re intentionally creating a color-blocked design.
Once you’re satisfied, take a reference photograph of the arrangement.
This will help you remember the order when joining the squares.
How to arrange the panel
- Lay the finished squares on a flat surface.
- Position them according to your planned width and length.
- Check the overall dimensions.
- Arrange the colors in a balanced pattern.
- Mark the squares that will sit near the shoulders and neckline.
- Identify any areas requiring shaping or partial motifs.
Helpful tip
If you’re using floral granny squares, rotate them consistently so the flowers face the same direction.
Step 4: Join the Front Panel Squares
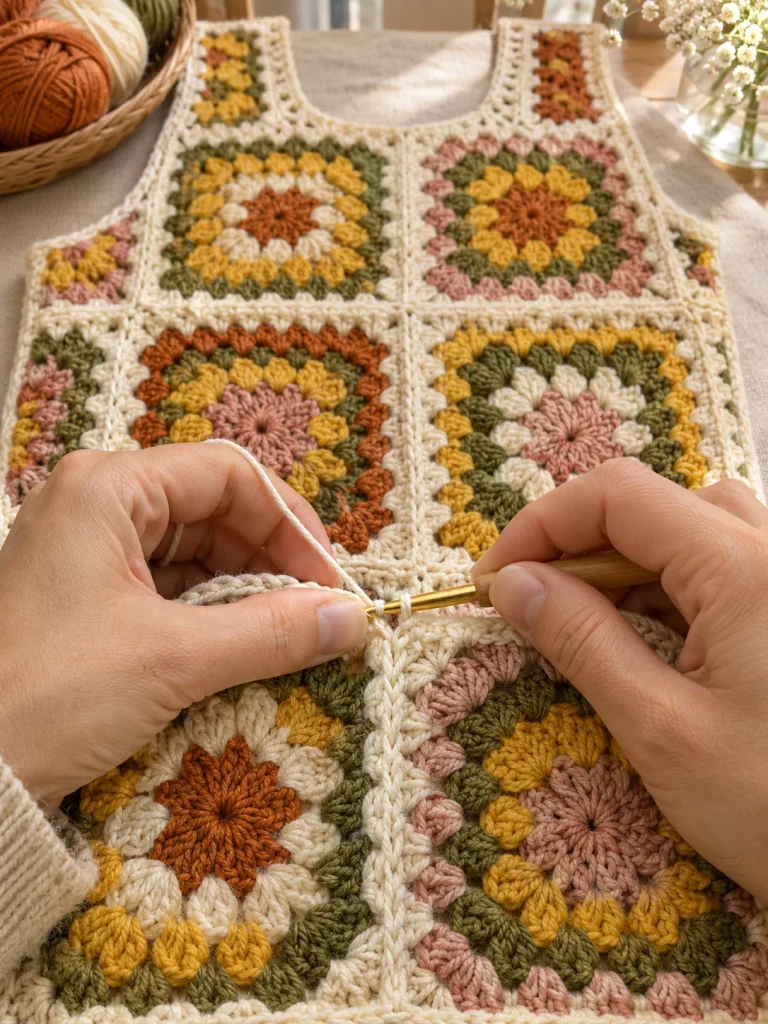
Once the arrangement is finalized, begin joining the squares.
Several joining methods can work, including slip stitch joins, single crochet joins, and sewn seams.
For a simple approach, you can use a slip stitch join.
Basic slip stitch joining method
- Place two squares with their right sides facing each other.
- Align the edges and corners.
- Insert your hook through corresponding loops along both edges.
- Attach the joining yarn.
- Work slip stitches along the edge.
- Keep the tension consistent.
- Continue joining the remaining squares according to your layout.
You can join squares into rows first and then connect the rows.
Alternatively, some joining methods allow you to connect motifs in longer continuous paths.
Important
Follow your planned neckline and shoulder shaping. Do not permanently join squares across an area that needs to remain open or be modified for fit.
Helpful tip
Check the panel regularly as you work.
If the joins are too tight, the panel may pucker.
If they are too loose, the seams may appear uneven.
Step 5: Create the Back Panel
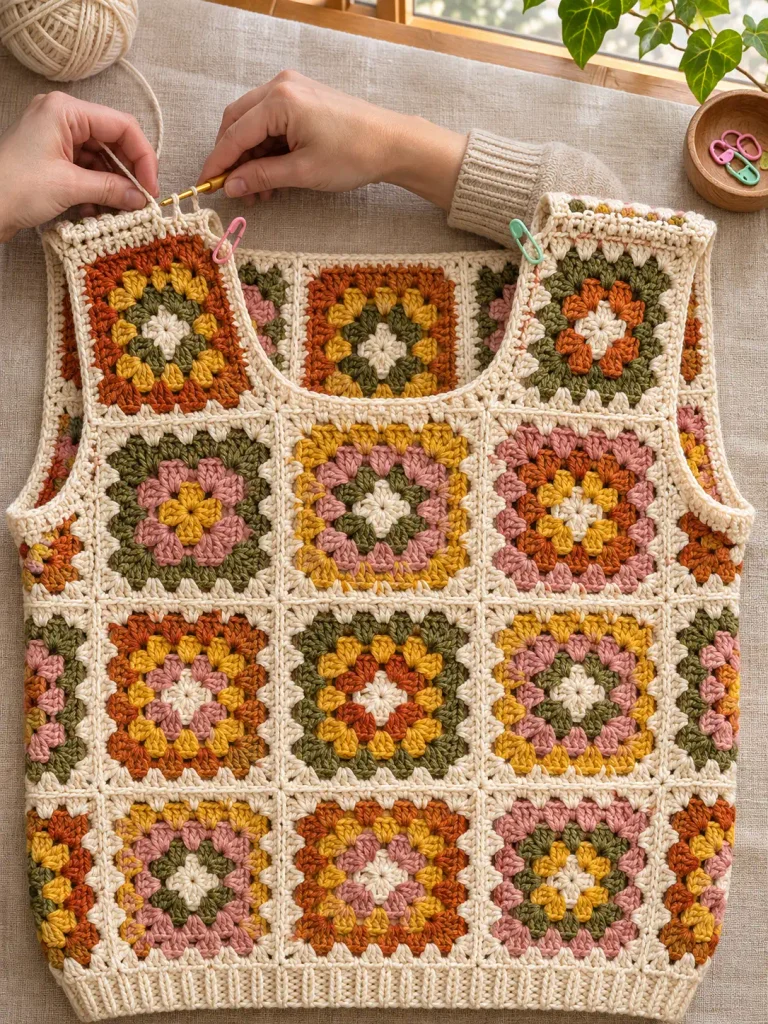
Repeat the panel assembly process for the back of the sweater.
The back panel should coordinate with the front and fit the intended garment measurements.
You can use the same color arrangement or create a complementary pattern.
For a balanced patchwork appearance, distribute the colors evenly.
Assembly steps
- Arrange the back panel squares.
- Confirm the panel measurements.
- Mark any neckline or shoulder shaping.
- Join the squares according to the layout.
- Lay the front and back panels together.
- Compare their dimensions.
Helpful tip
Check that the shoulder sections of the front and back are compatible before joining them.
If your sweater needs a shaped neckline, complete the necessary adjustments before final assembly.
Step 6: Connect the Shoulder Sections
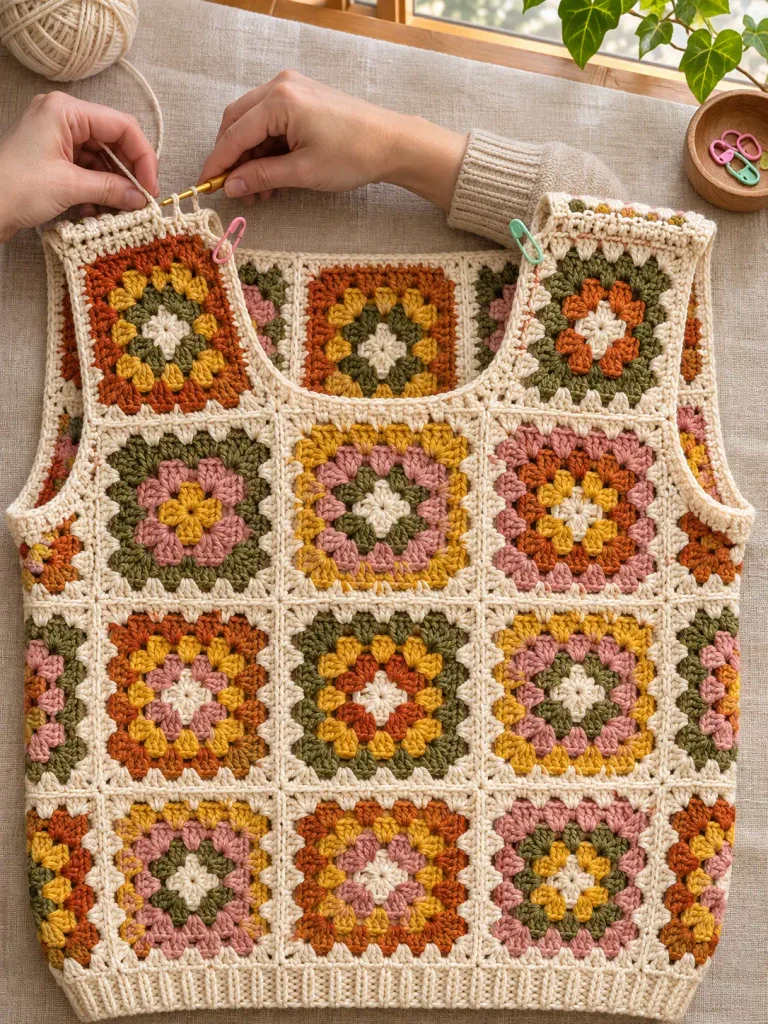
Place the front and back panels with their right sides facing each other.
Align the shoulder sections.
Before joining, make sure you’ve planned an opening large enough for the head to pass through comfortably.
The neckline must also sit properly on the shoulders.
Shoulder assembly
- Align the front and back shoulder sections.
- Mark the neckline opening.
- Check the width against your sweater measurements.
- Join the first shoulder section.
- Join the second shoulder section.
- Turn the joined panels right side out.
- Check the overall shape.
Helpful tip
Try the partially assembled garment over your head carefully, if the construction allows, before proceeding.
If the neckline is too narrow or the shoulders sit incorrectly, adjust the layout before attaching the sleeves.
Step 7: Assemble the Granny Square Sleeves
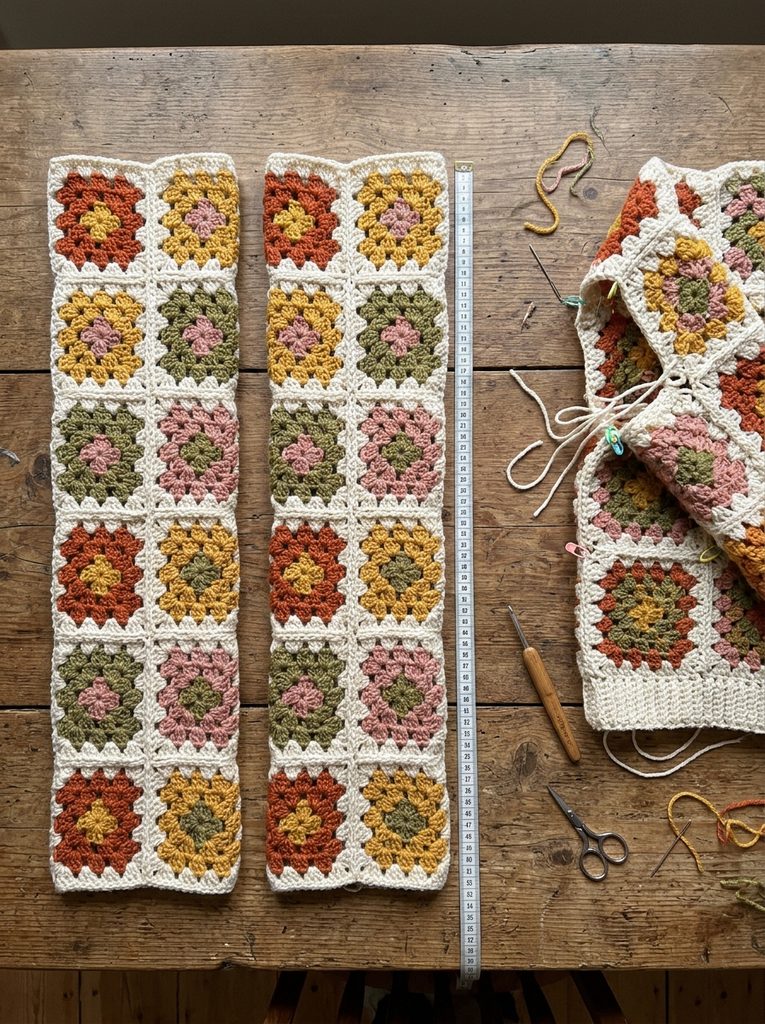
Now it’s time to prepare the sleeves.
A relaxed granny square sweater can use sleeve panels constructed from rows of connected motifs.
However, the number of squares depends on your desired sleeve length, upper-arm width, and cuff circumference.
Sleeve assembly
- Arrange the squares for the first sleeve.
- Measure the panel against your planned sleeve dimensions.
- Join the squares into the intended sleeve shape.
- Repeat for the second sleeve.
- Compare the two sleeve panels for consistency.
- Mark the upper edge that will attach to the armhole.
Important fit consideration
A rectangular sleeve panel may create a wide, boxy sleeve.
If you want a narrower wrist or more tailored shape, you may need additional crochet shaping or a different motif arrangement.
Helpful tip
Use the same joining technique on both sleeves so the seams look consistent.
Step 8: Attach the Sleeves to the Sweater Body
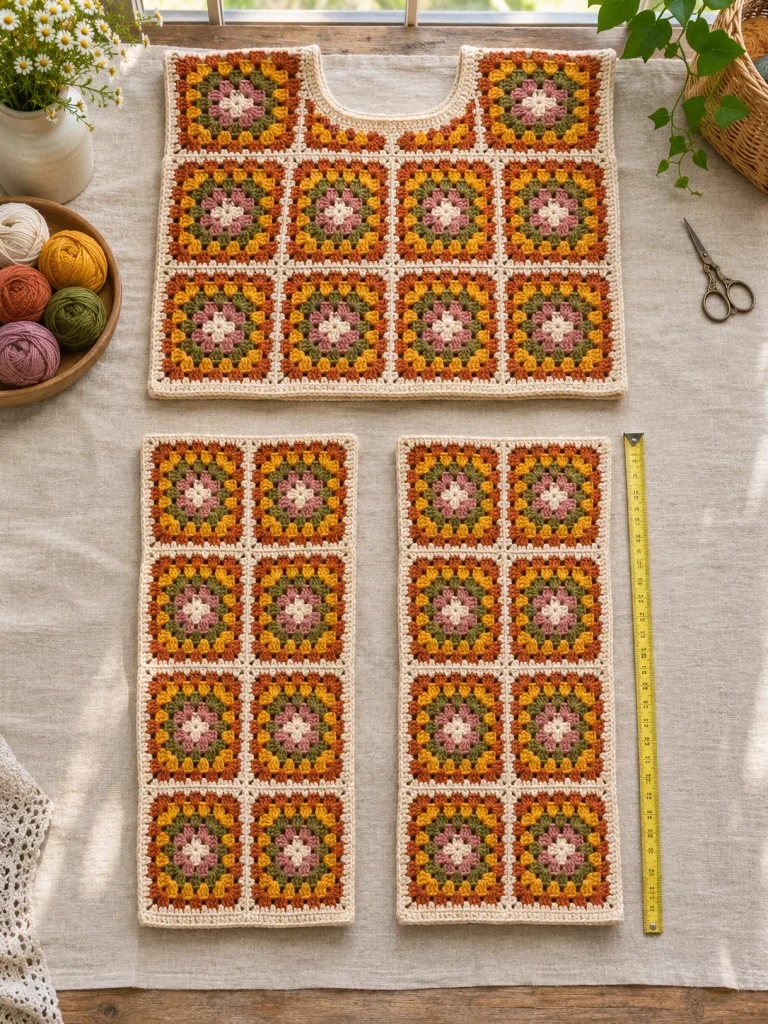
Lay the sweater body flat with the shoulder seams joined.
Position one sleeve along the armhole opening.
Make sure the center of the sleeve’s upper edge aligns with the shoulder seam.
Attachment steps
- Identify the armhole opening.
- Find the midpoint of the sleeve’s upper edge.
- Align that midpoint with the shoulder seam.
- Use stitch markers to secure the sleeve in place.
- Check that the sleeve edge and armhole measurements are compatible.
- Join the sleeve to the body using your chosen seam method.
- Repeat for the second sleeve.
Helpful tip
Do not force a sleeve into an armhole that is significantly smaller or larger.
Adjust the dimensions before permanently joining the pieces.
Step 9: Close the Side and Underarm Seams
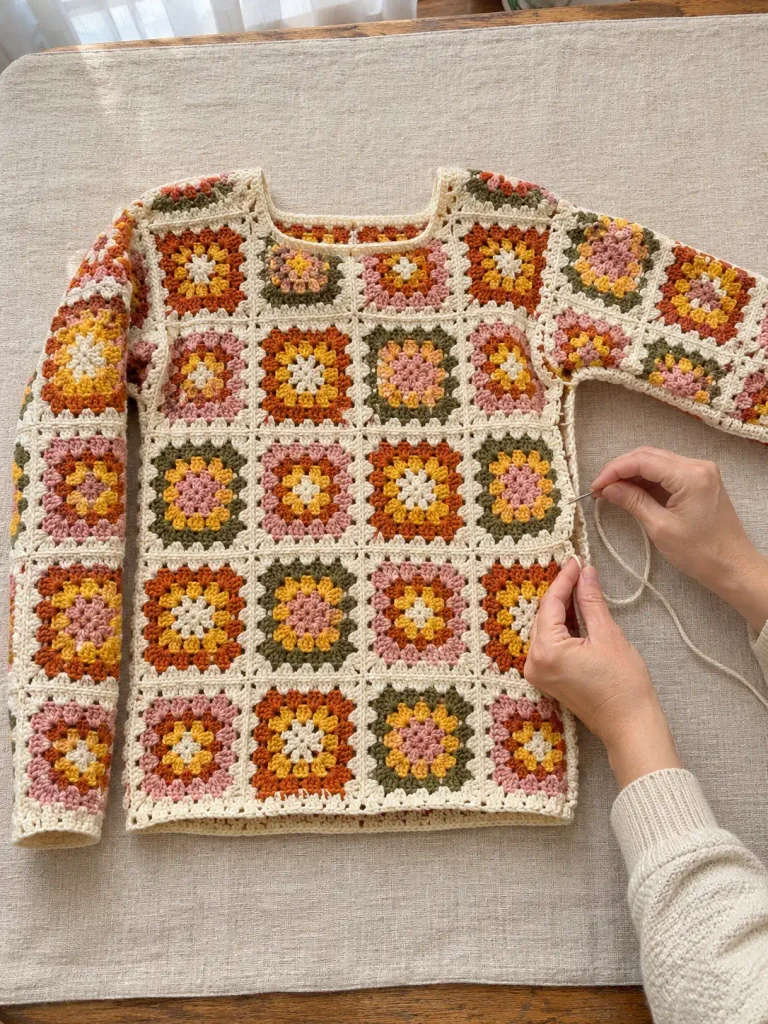
With the sleeves attached, close the remaining seams.
For a drop-shoulder construction, you can often join the underarm and side seams in one continuous line.
Assembly steps
- Turn the sweater inside out.
- Align the edges of one sleeve.
- Begin joining at the cuff.
- Continue toward the underarm.
- Follow the side edges down to the sweater hem.
- Secure the yarn.
- Repeat on the other side.
Check that both sleeves and side seams are aligned.
Helpful tip
Before fastening off, check that the garment has enough room through the chest and upper arms.
Avoid overly tight seams that restrict movement.
Step 10: Finish the Neckline
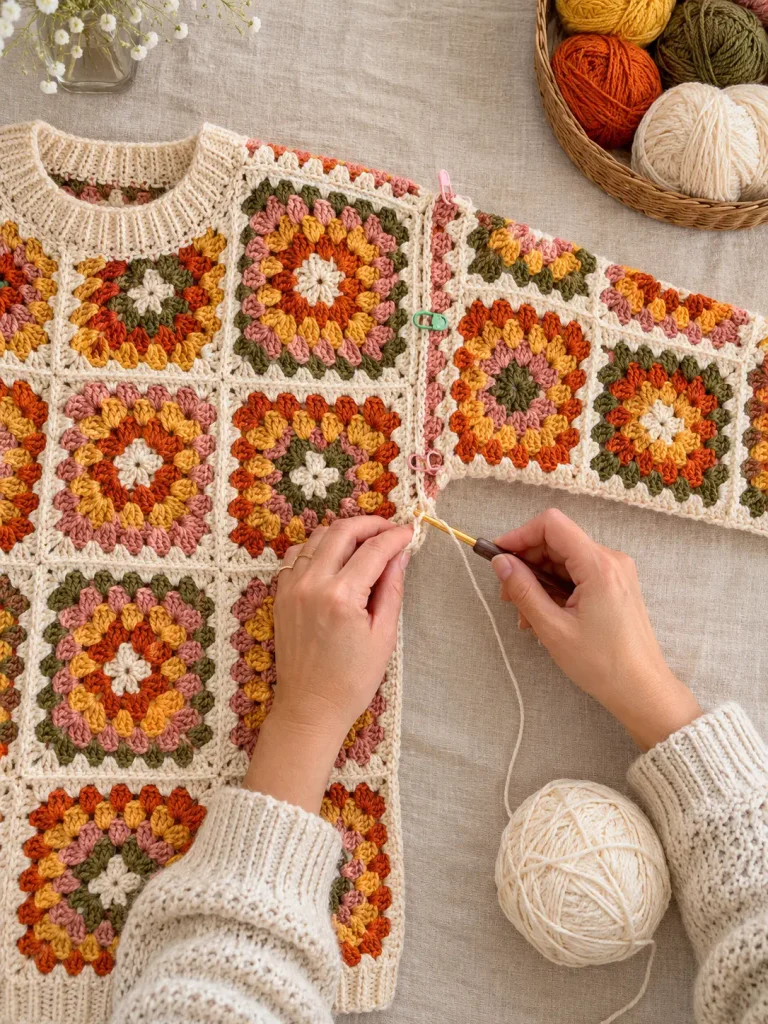
The neckline is one of the most important finishing details of a crochet pullover.
A simple crochet border can help create a more polished appearance.
Neckline finishing
- Identify the complete neckline opening.
- Join your edging yarn at a discreet point.
- Work an even foundation round of suitable stitches around the opening.
- Adjust stitch placement where the neckline curves or changes direction.
- Add additional edging rounds if desired.
- Check that the opening remains comfortable.
- Fasten off and secure the yarn ends.
Helpful tip
A neckline that is too tight may make the sweater difficult to pull over your head.
Check the opening before adding multiple edging rounds.
Step 11: Add Crochet Cuffs and a Hem Border
AI Image Prompt:
Ultra-photorealistic vertical 3:4 premium craft photograph showing the lower sleeve cuffs and hem of a handmade retro granny square pullover sweater being finished with coordinated cream ribbed-style crochet edging. The sweater features neat colorful square motifs in burnt orange, mustard yellow, olive green, dusty pink, and cream, with straight joining seams and realistic crochet texture. One sleeve cuff lies near the camera with adult hands holding a crochet hook and cream yarn, while the finished sweater body extends across a natural linen worktable. Warm natural daylight, detailed professional handmade crochet tutorial photography, no text, no watermark.
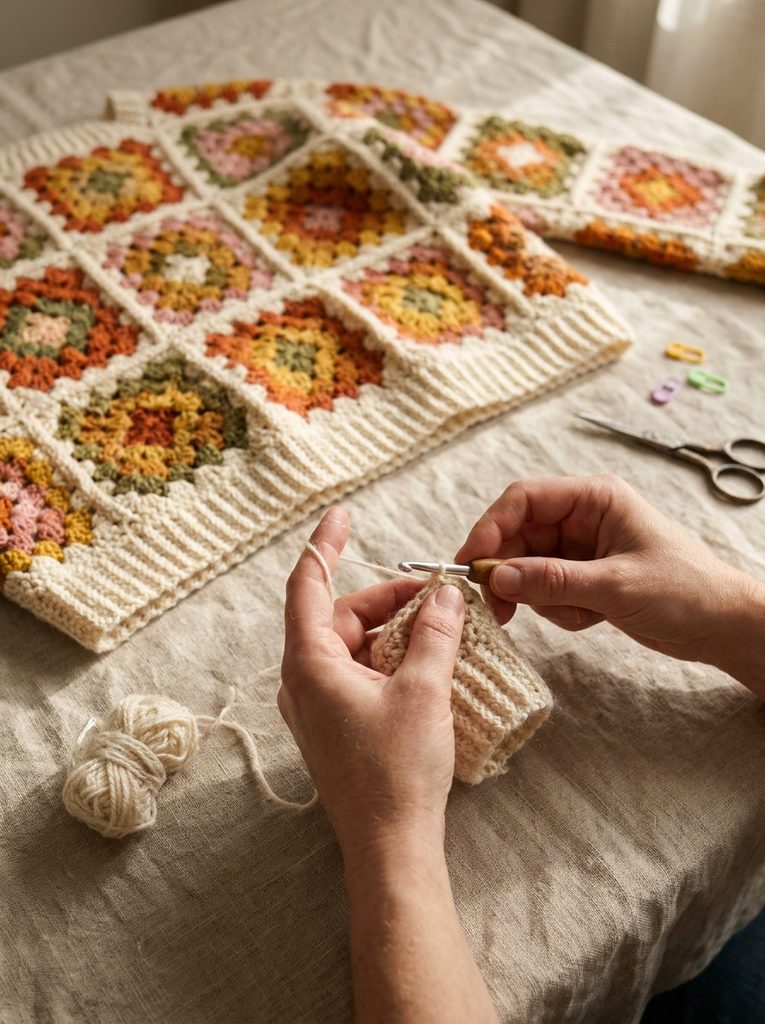
Finishing the cuffs and hem helps give your sweater a more complete appearance.
You can use simple crochet edging or a ribbed-style border.
Cuff finishing
- Join your edging yarn around the sleeve opening.
- Work a foundation round.
- Adjust the stitch count as needed for the intended cuff circumference.
- Add your preferred cuff edging.
- Repeat for the second sleeve.
Hem finishing
- Join yarn along the lower edge of the sweater.
- Work an even foundation round.
- Add the desired border.
- Keep the hem flexible enough for comfortable wear.
- Fasten off and weave in the yarn ends.
Helpful tip
If you want the cuffs to fit more closely than the sleeves, use a suitable shaping or ribbing method rather than pulling the yarn excessively tight.
Step 12: Weave in Ends, Block, and Check the Fit
Your sweater is almost finished!
Take time to secure the yarn ends and inspect the garment.
Final finishing checklist
- Weave in all loose yarn ends securely.
- Check the shoulder seams.
- Inspect the sleeve attachment points.
- Check the underarm and side seams.
- Examine the neckline and cuffs.
- Block the garment if appropriate for the yarn.
- Allow it to dry completely.
- Try on the sweater and evaluate the fit.
If necessary, make adjustments to the finishing details.
Helpful tip
Store heavier crochet sweaters folded rather than hanging them for long periods, as their weight may stretch the fabric.
6 Beautiful Granny Square Crochet Sweater Color Variations
Once you understand the basic construction concept, you can experiment with different color palettes and motifs.
The following six variations use the same relaxed pullover concept, with long sleeves, a finished neckline, and visible square motifs.
Each design can inspire a unique sweater while maintaining the recognizable granny square appearance.
1. Colorful Retro Granny Square Sweater
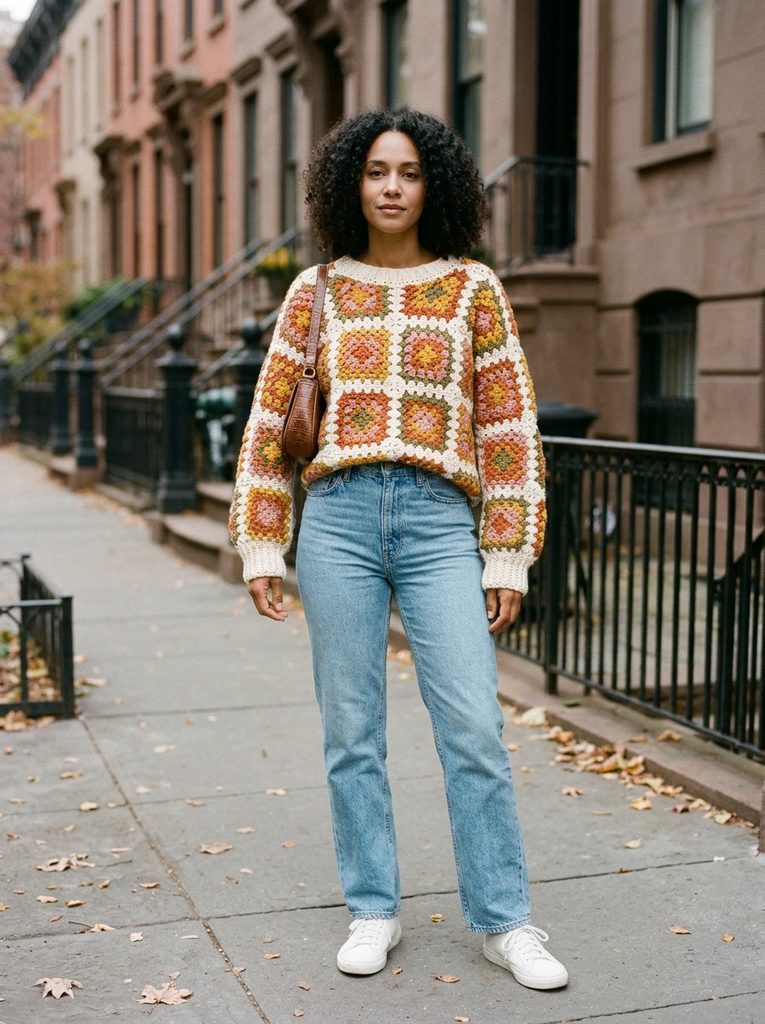
This colorful retro design celebrates the playful personality of traditional granny square crochet.
Warm orange, mustard, olive green, and dusty pink create a vintage-inspired patchwork appearance.
Cream borders help organize the different colors and keep the square motifs visually distinct.
The relaxed silhouette makes the sweater easy to style with jeans and casual shoes.
Color palette
Burnt orange, mustard yellow, olive green, dusty pink, and cream.
Styling idea
Wear it with light-wash denim, white sneakers, and simple accessories.
Best for
Vintage-inspired outfits, casual weekends, autumn streetwear, and colorful handmade fashion.
2. Cream and Beige Granny Square Sweater
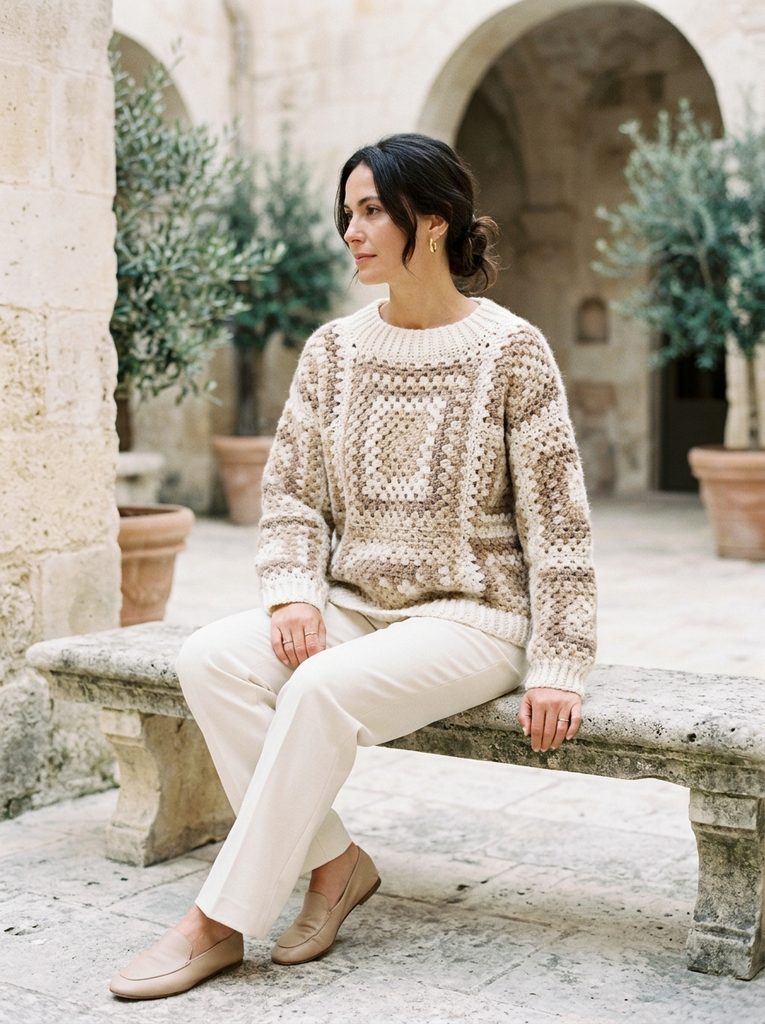
A neutral granny square sweater is perfect for anyone who prefers understated handmade fashion.
Cream, oatmeal, and beige shades highlight the crochet texture without relying on bright colors.
The result feels calm, sophisticated, and easy to combine with everyday wardrobe pieces.
Color palette
Ivory, oatmeal, warm taupe, camel, and cream.
Styling idea
Pair it with cream trousers, beige loafers, and delicate jewelry.
Best for
Minimalist wardrobes, cozy everyday outfits, casual offices, and neutral fall fashion.
3. Pink and Lavender Granny Square Sweater
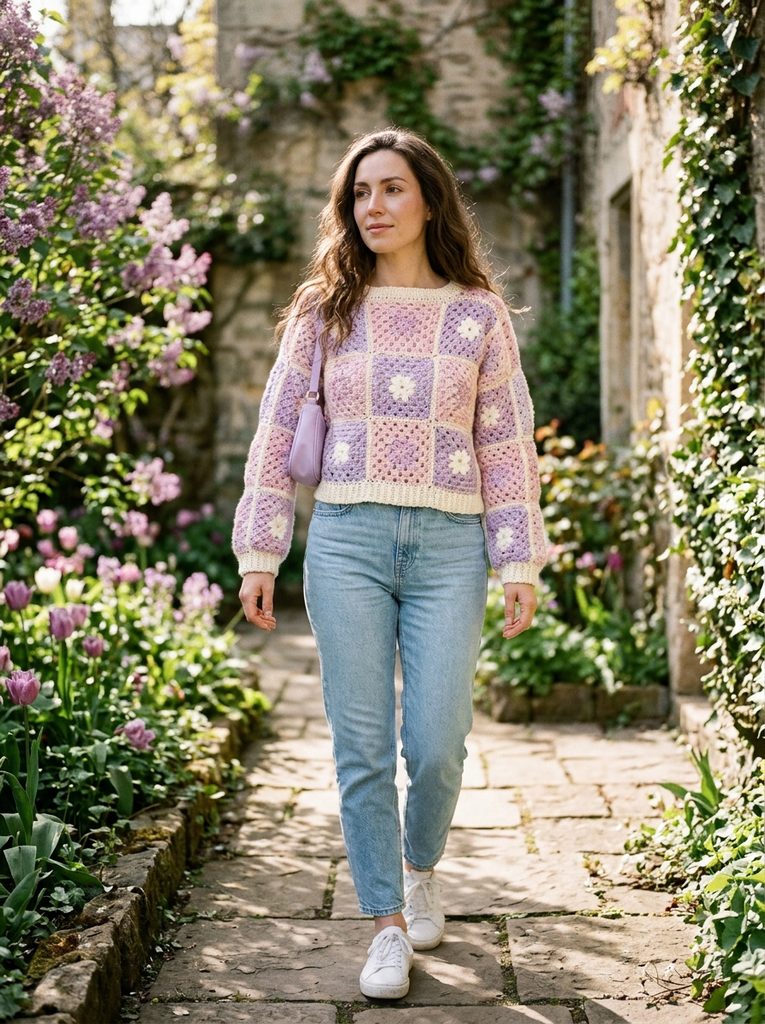
A pink and lavender granny square sweater creates a soft, romantic handmade look.
Blush pink and lavender work beautifully together, especially when balanced with ivory borders.
Small floral motifs can introduce additional texture without overwhelming the design.
Color palette
Blush pink, lavender, pale lilac, and ivory.
Styling idea
Combine the sweater with light-wash jeans, white sneakers, and a lavender handbag.
Best for
Spring outfits, romantic casual fashion, pastel wardrobes, and weekend brunches.
4. Sage Green Granny Square Sweater
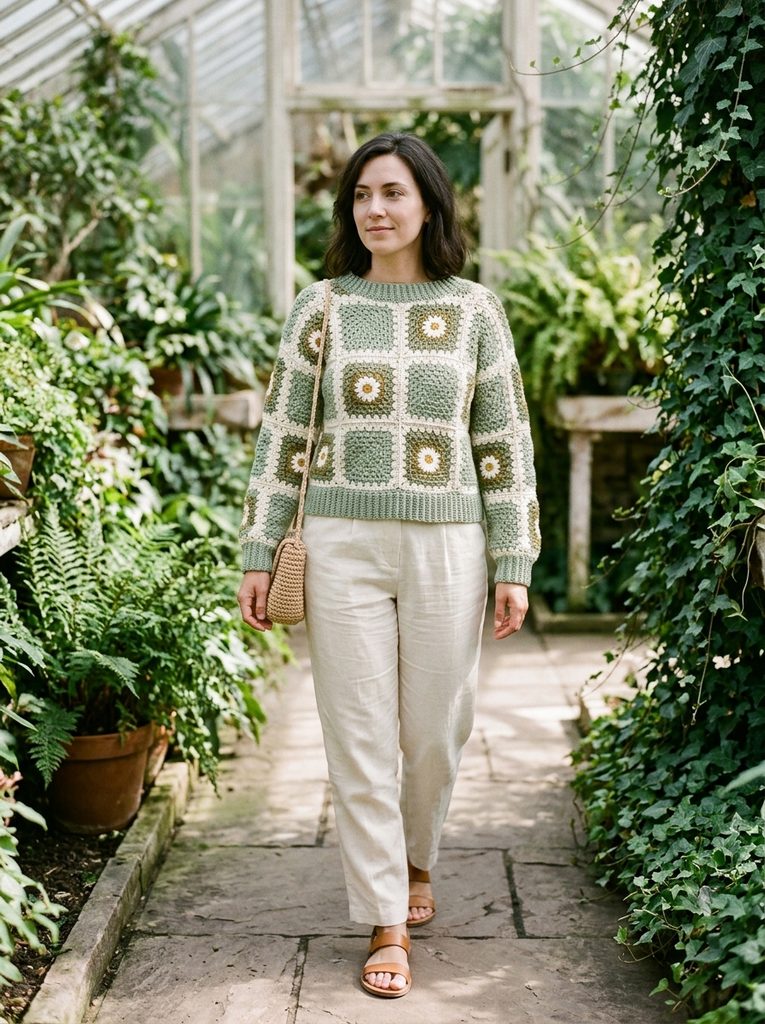
Sage green is a beautiful choice for a soft botanical-inspired granny square sweater.
The combination of muted green, ivory, and subtle floral details creates a fresh, natural appearance.
This palette works particularly well for spring and early autumn layering.
Color palette
Sage green, olive green, ivory, and soft yellow.
Styling idea
Wear it with cream trousers, tan shoes, and a natural woven bag.
Best for
Botanical-inspired fashion, relaxed spring outfits, and understated handmade styling.
5. Sunflower Granny Square Sweater
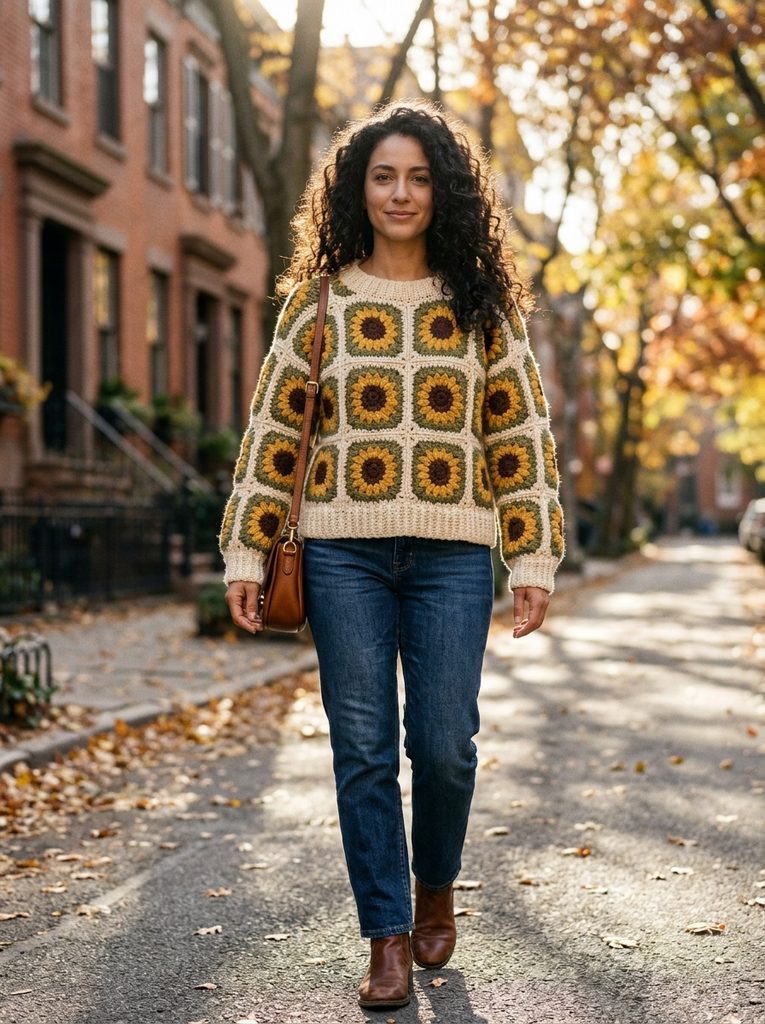
A sunflower granny square sweater brings warmth and personality to an autumn wardrobe.
Golden yellow petals and dark brown centers create a recognizable floral pattern.
Olive green backgrounds and cream borders help balance the stronger colors.
Color palette
Golden yellow, chocolate brown, olive green, and cream.
Styling idea
Pair it with dark denim, brown boots, and simple gold accessories.
Best for
Fall festivals, pumpkin patch visits, cozy autumn outfits, and vintage-inspired fashion.
6. Pastel Rainbow Granny Square Sweater
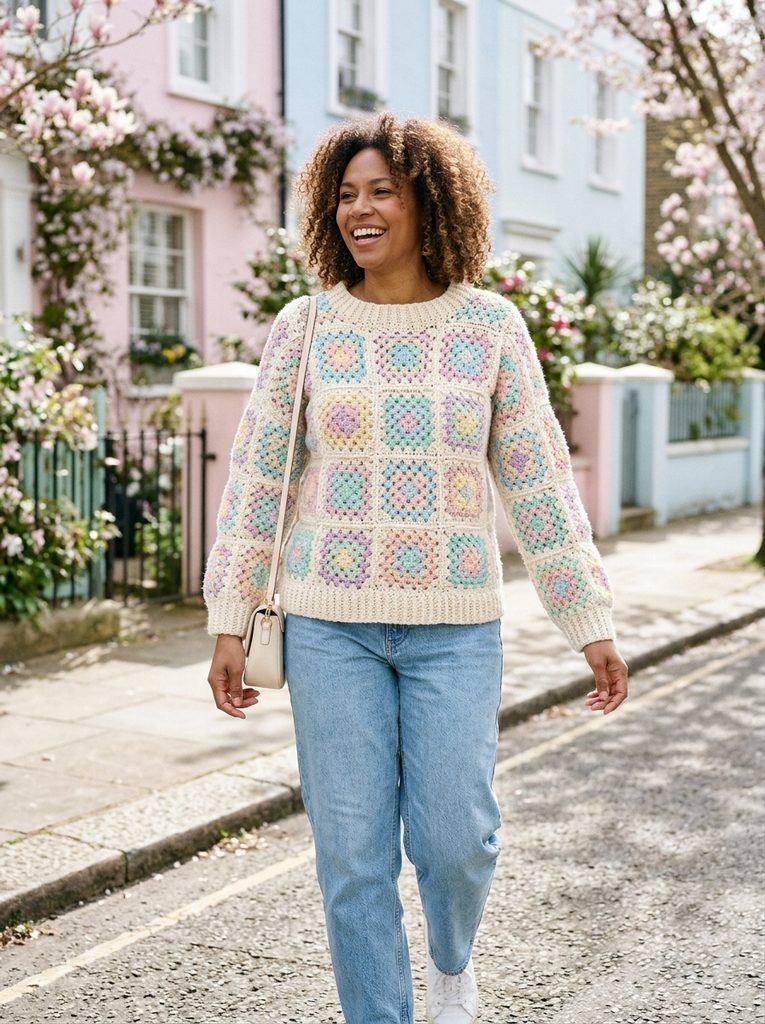
A pastel rainbow granny square sweater is a cheerful way to enjoy colorful crochet without using overly bold shades.
Soft pink, mint, lilac, butter yellow, and baby blue create a playful combination.
Cream borders unify the colors and give the sweater a balanced appearance.
Color palette
Baby blue, mint green, blush pink, butter yellow, lilac, and cream.
Styling idea
Wear it with light-wash jeans, white sneakers, and simple cream accessories.
Best for
Spring fashion, cheerful everyday outfits, casual weekends, and pastel-inspired wardrobes.
How to Choose the Right Granny Squares for a Sweater
Not every granny square is equally suitable for garment construction.
Some motifs create flexible fabric, while others are thick, stiff, or heavily textured.
For a comfortable sweater, consider the following factors.
Motif size
Choose squares that work with your intended garment dimensions.
Very large squares can create bold patterns, but they may offer fewer options for shaping.
Smaller squares allow more detailed color arrangements and potentially more flexibility in panel planning.
Yarn weight
Heavier yarns can create thick, warm fabric, but they also increase the total weight of the sweater.
Lighter yarns may produce a softer drape.
Stitch density
Openwork granny squares can create breathable fabric but may offer less warmth.
Denser motifs provide more coverage.
Consistent dimensions
Squares with different dimensions can be difficult to join neatly.
Measure and block motifs as appropriate before assembly.
Comfortable texture
Consider how the yarn feels against the skin.
If the sweater will be worn directly over a thin top, softer yarns may be preferable.
Best Joining Methods for Granny Square Sweaters
There are several ways to connect crochet motifs.
Each method creates a slightly different appearance.
Slip stitch join
A slip stitch join can create a relatively neat seam.
It is often used when crocheters want a straightforward joining technique.
Single crochet join
Single crochet joins can create more pronounced seams.
They may be attractive when you want the joining lines to become part of the design.
Whip stitch seam
A whip stitch uses a yarn needle rather than a crochet hook.
It can be useful for sewing motifs together.
Mattress stitch
Mattress stitch can create a less noticeable seam when worked appropriately.
It is often used when a smoother appearance is desired.
Which joining method is best?
Choose a joining method that suits the yarn, motif construction, and desired garment flexibility.
Test your preferred method on two spare squares before joining the entire sweater.
How to Make Your Granny Square Sweater Fit Better
Fit is one of the most important parts of sweater construction.
A beautiful arrangement of squares will not automatically produce a comfortable garment.
Measure before joining
Use a sweater you already own as a reference.
Compare the planned dimensions with the garment you want to create.
Allow comfortable movement
A relaxed sweater needs enough room through the chest, shoulders, and arms.
Plan the neckline carefully
The neckline must be large enough to pass over your head comfortably.
It should also sit properly around the shoulders.
Check sleeve proportions
Sleeves that are too wide may feel bulky, while sleeves that are too narrow can restrict movement.
Consider the weight
Large crochet sweaters can become heavy.
The weight of the finished fabric may affect the drape and overall fit.
Try on during assembly
Where possible, check the fit before completing permanent seams and edging.
This makes adjustments easier.
Common Granny Square Sweater Assembly Mistakes
Joining squares before planning the layout
Always arrange the motifs and confirm the garment measurements first.
Using inconsistent square sizes
Squares with different dimensions can create uneven panels.
Making the neckline too narrow
A pullover must have a comfortable opening for the head.
Attaching sleeves without measuring
The sleeve’s upper edge must be compatible with the armhole.
Pulling joining seams too tightly
Tight seams can cause puckering and reduce flexibility.
Ignoring garment weight
Heavy yarn and dense motifs may create a sweater that stretches or hangs differently than expected.
Skipping the final fit check
Inspect the sweater before considering it finished.
How to Care for a Handmade Granny Square Crochet Sweater
Proper care can help preserve the shape and texture of a handmade sweater.
Always follow the care instructions for the yarn used.
Some yarns require hand washing, while others may tolerate a gentle machine cycle.
Avoid aggressive twisting or wringing.
When appropriate, gently reshape the sweater and lay it flat to dry.
Store heavier crochet garments folded rather than hanging them for extended periods.
Check the joining seams periodically, especially around the shoulders and underarms.
Frequently Asked Questions
Can beginners make a granny square crochet sweater?
Beginners who already know how to make granny squares may be able to attempt a simple sweater assembly project.
However, garment sizing, neckline construction, sleeve attachment, and finishing require additional skills.
How many granny squares do I need for a sweater?
The number depends on the size of the motifs, garment dimensions, sleeve design, and intended fit.
There is no universal number that works for every sweater.
Can I make a sweater using only granny squares?
Yes, some designs use granny squares for most or all of the garment.
However, additional shaping, partial motifs, or crochet edging may be needed for a comfortable fit.
What’s the difference between a granny square sweater and a cardigan?
A pullover sweater has a closed front and is pulled over the head.
A cardigan has a front opening and may include buttons or other closures.
What yarn works best for a granny square sweater?
Cotton, acrylic, wool, and blended yarns can all work, depending on the desired texture, warmth, weight, and drape.
Can I use flower granny squares?
Yes.
Flower motifs can create beautiful decorative sweaters.
Make sure the squares are consistent in size and suitable for wearable fabric.
How do I stop my sweater from stretching?
Choose suitable yarn, avoid unnecessarily heavy construction, use appropriate joining techniques, and store the finished garment carefully.
Do I need to block granny squares before joining?
Blocking can help improve consistency and shape when appropriate for the yarn.
Can I make an oversized granny square sweater?
Yes.
A relaxed or oversized silhouette can work well with patchwork crochet.
However, the garment still needs carefully planned measurements.
Can I change the sweater colors?
Absolutely.
You can create retro, neutral, floral, pastel, or earthy designs by changing the colors of the granny squares.
Is this a complete tested sweater pattern?
No.
This is an assembly-focused guide that explains the general construction process.
It does not provide verified size grading, exact stitch counts, or a tested motif layout for every garment section.
For precise sizing and construction, use a tested sweater pattern or develop and test your own garment measurements.
Final Thoughts
Making a granny square crochet sweater is a creative way to transform individual crochet motifs into a unique handmade garment.
From arranging the front and back panels to attaching sleeves and finishing the neckline, every stage brings the project closer to a wearable piece.
The most important part is planning the construction carefully.
Consistent granny square dimensions, accurate measurements, comfortable shaping, and flexible joining seams can make a significant difference to the finished result.
Once you’ve explored the basic assembly concept, you can experiment with different colors and motifs.
A colorful retro sweater creates a playful vintage look, while cream and beige offer a more understated style.
Pink and lavender designs feel romantic, sage green creates a botanical appearance, sunflower motifs bring autumn charm, and pastel rainbow squares add cheerful spring color.
Whether you’re planning your first granny square pullover or looking for new ways to use a collection of finished motifs, these ideas offer plenty of creative inspiration.
Which granny square sweater color combination would you love to make first?